How to Create a New Milkymap
Creating a Milkymap is one of the first and one of the most important steps for getting started and using the platform. A Milkymap is our term for a Customer Journey Map, which can be used to visualize the experience of customers, employees, patients, citizens, etc.
Jump to
Creating a Milkymap
Making new Milkymaps is an important task for your Customer Experience. Visualizing new Milkymaps is a way for you to zoom in and analyze a different journey your customers are experiencing. To create a new Milkymap:
In the top navigation bar, press Milkymaps to open the dropdown menu
Click ‘My Milkymaps’ here to go to the My Milkymaps window.
In the top right-hand corner, below the top navigation bar, click the ‘+ Create New’ button
This will open up a new page containing a New Milkymap.
You can also create new Child Milkymaps, or if you’re an admin; Parent Milkymaps. They require slightly different steps than a ‘regular’ Milkymap.
Creating a Child Milkymap
Use the top navigation bar and press ‘Milkymaps’
Select ‘Our Milkymaps’ or a custom viewing tab containing published Milkymaps
In the top right hand corner, press the ‘+ Create New’ button.
This opens up a selection window where you can press 'Child Milkymap
Creating a Parent Milkymap
Use the top navigation bar and press ‘Milkymaps’
Select ‘Our Milkymaps’ or a custom viewing tab containing published Milkymaps
In the top right hand corner, press the ‘+ Create New’ button.
This opens up a selection window where you can press ‘Parent Milkymap’
You can also create a Milkymap by Importing one. This means you don’t have to start from scratch, but can add to the information that is already provided.
Milkymap Settings
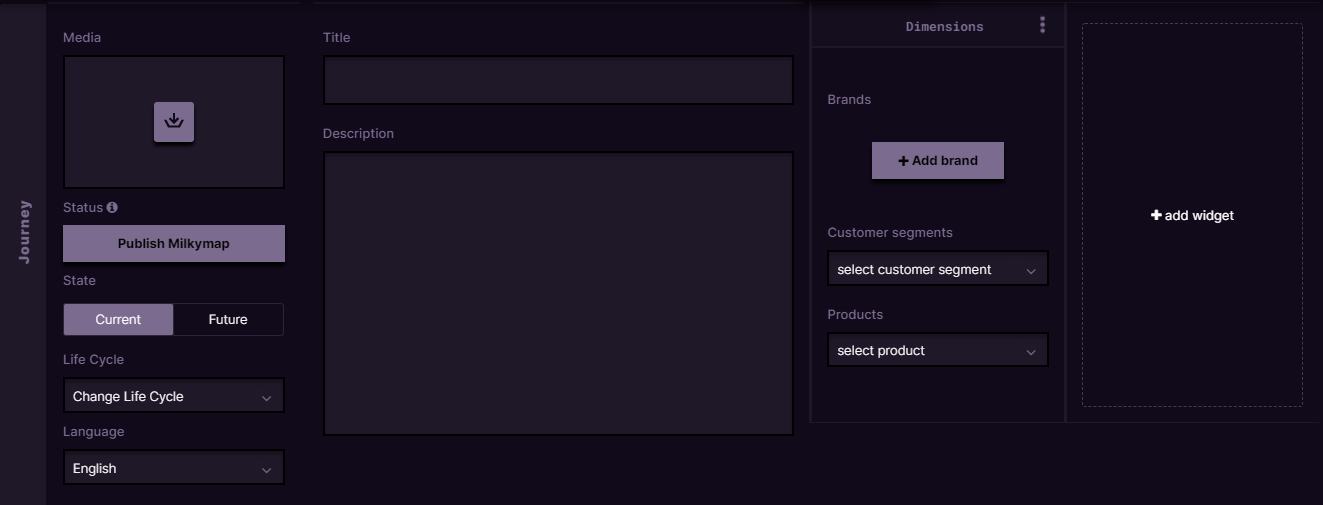
There are three options within a Milkymap that we would consider the Milkymap Settings, which can be found at the left of your Milkymap:
Current or Future State - You can specify if your Milkymap is meant to visualize either Current or Future State. Current State maps are used to visualize the current situation of the Customer Experience in this particular Customer Journey. You can also create Future State maps, which visualize the desired situation. This desired Customer Experience in this particular journey can be used as an objective or goal for your organisation. You’re hoping to turn the Current State map into the Future State map through your CX efforts.
Life Cycle - The Life Cycle within your organisation that you’re connecting this Milkymap to. CX Life Cycles are created in Milkymap by your Galaxy account admin and then become available for you to link to your Milkymaps. A CX Life Cycle is a framework you can connect all your Customer Journeys to. It consists of Stages a customer moves through in relation to an organisation. To find out more about a CX Life Cycle Model, go here.
Language - Specify the Language that you’re creating your Milkymap in. Milkymap currently offers the following Languages as Language Options; English, Dutch, Spanish, German, French and Italian.
Information in a Milkymap
You can add information to your Milkymap at different levels. The Structure of a Milkymap consists of general information, or Milkymap details, Episodes, and Touchpoints. You can enrich your Milkymaps using Widgets, Episode Lanes, and Touchpoint Lanes. As a default Widget, Dimensions are included in your Milkymap.