Setting Up & Organizing Content Management
As a Galaxy account admin (or admins), you’ll be in charge of setting up your organisation’s Content Management. The way you set up Content Management will determine how all the users in your account use Channels, KPIs, Files, Personas, and Dimensions.
Jump to
Channels
Channels are the medium through which a customer performs a certain activity, or a certain customer activity takes place. As an admin, you’re responsible for setting these up for others to use.
Setting Up & Adding Channels
In the top navigation bar, press ‘Content Management’ to open the dropdown menu
Select 'Channels' by clicking it.
This will take you to the Channel Settings page
Use the ‘Add new Channel’ button to add a new Channel field at the bottom of your list of Channels.

In a Channel field, you can adjust everything regarding that Channel:
Channel Information & Options
Channel Name - specify the name of your Channel in a way that is clear for you and the users within your organisation. E.g. ‘Website’, ‘App’, or ‘Telephone’. This is a required field.
Channel Definition - Define the Channel here by adding a description. This will allow you to create no overlapping Channels and enable you to create a clear and complete list. This is an optional field.
Translations - To add standardized Translations for your Channels if you’re working in an international environment for example. This will help users create maps in multiple languages, while still ensuring they use the same list of Channels.
Viewable or Not-Viewable - By using the eye icon at the right of the Channel field, you can make Channels available or unavailable to select for users.
Delete - Clicking the trash icon will allow you to delete Channels. A warning message will first pop up, if you’re sure you want to delete, press the ‘Delete’ button. If you’re unsure, use the X in the top right corner of the Warning pop-up.
Setting Up & Adding Subchannels
Go to the Channel Settings page by going to ‘Content Management' and pressing ‘Channels’
Find a Channel you’d like to add Subchannels to
Use the ‘+ Create Subchannel’ button to open up a text field where you can add your new Subchannel

Other Subchannel information and options are optional, like adding translations, definitions and making it viewable or non-viewable.
Every Channel and Subchannel can only appear once in every account, so make sure to be consistent in your classification
Channel Requests
As a Galaxy Account admin, you will receive Channel Requests from users in your organisation. They will show up at the top of your Channel list, under Requests. If there a no pending requests, it will read 'No requests.

If you do have pending requests, however, they will show up listed under requests, looking like the example below.

Use the checkmark to accept the Request and make it available for users in your organisation to use.
Use the X to dismiss the Request. This Channel will not be available for your organisation to use.
In the example above, the Request ‘Internetsite’ and the existing ‘Website’ channel are extremely similar. You can therefore press the X to dismiss the Request.
KPIs
Setting up ‘Our KPIs’ will allow you to monitor the performance of your Milkymaps. Any KPIs you define can be added by users in different places in their Milkymaps: at an overall map level, or more specifically by using Lanes at either an Episode or a Touchpoint (more detailed) level.
Read more about creating KPIs here.
Files
Under File Management, you can add Files that are relevant for your organisation to add to their Milkymaps. These could be Files containing CX data, marketing communication, customer feedback, or strategies.
Setting Up & Adding Files
In the top navigation bar, press ‘Content Management’ to open the dropdown menu
Select 'Files' by clicking it.
This will take you to the File Management page
Use the ‘Upload File’ button to open an Attachment window
File / Attachment Options
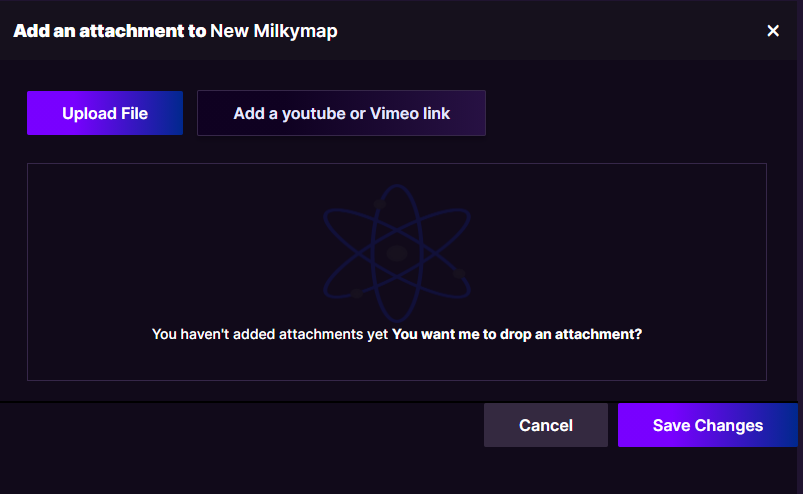
Use the Upload File button to browse your files and select one to upload. Milkymap supports PowerPoint, Word, PDF, and Excel files.
Add a YouTube or Vimeo link, this will open a new window where you can paste the URL. After pasting the URL, you can press ‘Validate Link’ to create a preview of the video to see if it’s correct. You can either press ‘Done’ once you’re satisfied or ‘Change Link’ if you want to add a different video. If you don’t want to add a video, either press ‘Cancel’ or the X in the top right corner of the ‘Add an Attachment’ window.
Drag & Drop an attachment in the field to add PowerPoint, Word, PDF, and Excel files in a different way.
Finish by either pressing ‘Save Changes’ to keep the adjustments, or click ‘Cancel’ or the X in the top right corner to discard any additions or edits.
Dimensions
Dimensions allow you and the users in your account to add information to your Milkymap, regarding Brands, Customer Segments, and Products. Later on, you can filter Milkymaps based on these dimensions, so you have a filtered overview. Which journeys are relevant for a specific Customer Segment for example.
Setting Up & Adding Dimensions
In the top navigation bar, press ‘Content Management’ to open the dropdown menu
Select 'Dimensions' by clicking it.
This will take you to the Brands page. If you want to work on setting up different Dimensions, use the dropdown menu on the left side by clicking Dimensions. This will enable you to set up Customer Segments and Products.
Types of Dimensions
Brands
Customer Segments
Products
Countries
Brand Information & Options
Press the ‘+ Add Brand’ button to create a new Brand field.
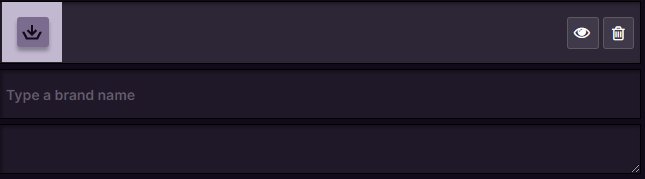
In a Brand field, you can add the following information:
Brand Image - by using the button in the top left corner to add. We suggest using the logo of that brand.
Brand Name
Brand Description - Add to keep everything organized, at the brand’s mission or vision statement, slogan, or whatever else you feel like adding.
Viewable or Not-Viewable - By clicking this icon you can make the brand available for other users to include in their Milkymaps or not.
Delete - Use the trashcan icon to delete a Brand. A warning message will first pop up, if you’re sure you want to delete, press the ‘Delete’ button. If you’re unsure, use the X in the top right corner of the Warning pop-up.
Customer Segment Information & Options
Click the ‘+ Add customer segment’ button to open a Customer Segment field.

Customer Segment Name - Fill in the name you and your organisation use for your Customer Segments, like Corporate, B2C, Strategic Partner etc.
Customer Segment Description - To provide more context for your name if necessary, or to add any relevant information regarding this particular segment.
Viewable or Not-Viewable - By clicking this icon you can make the Customer Segment available or unavailable for other users to include in their Milkymaps.
Delete - Use the trashcan icon to delete Customer Segments. A warning message will first pop up, if you’re sure you want to delete, press the ‘Delete’ button. If you’re unsure, use the X in the top right corner of the Warning pop-up.
Product Information & Options
Using the ‘Add Product’ button, you can generate a new Product field. In a Product field you can include:
Product Name - The Name of your Product or Product Category. For a Telecom provider, you could use internet, TV, and mobile for example.
Product Description - Add more relevant information to your Product.
Viewable or Not-Viewable - By clicking this icon you can make the Product available or unavailable for other users to include in their Milkymaps.
Delete - Use the trashcan icon to delete Customer Segments. A warning message will first pop up, if you’re sure you want to delete, press the ‘Delete’ button. If you’re unsure, use the X in the top right corner of the Warning pop-up.
Country Information & Options
Using the ‘+ Add Country’ button, you can generate a new field where you can add a Country. There you can add:
Country name - The name of the Country.
Viewable or Not-Viewable - By clicking this icon you can make the Country available or unavailable for other users to include in their Milkymaps.
Delete - Use the 'x' icon to delete Products. A warning message will first pop up, if you’re sure you want to delete, press the ‘Delete Country’ button. If you’re unsure, use the X in the top right corner of the Warning pop-up.
Icons
As a Galaxy account admin, you currently can not add or remove any icons. You are able, however, to view the full overview consisting of 700 icons in our Icon Library. Users of the platform are able to incorporate these icons into their Milkymaps, where they can also adjust the name.