How to Create a CX Life Cycle Model
Galaxy account admins can create the CX Life Cycle Model for their organisation. Regular users can connect the model to Milkymaps using Contact Reasons in Touchpoints but aren't able to create a new or edit the existing CX Life Cycle Model.
Jump to
Only Galaxy account admins can create or adjust the CX Life Cycle Model of your organisation.
Creating your Organisation’s CX Life Cycle Model
After you’ve decided on the Stages, Phases, and Contact Reasons for your organisation and you’ve validated the model, you’ll want to add the CX Life Cycle Model to your organisation's Milkymap account.
Go to the Dashboard using the top navigation bar in the platform.

Once you’re in the Dashboard, you can use the ‘Create new CX Life Cycle Model’ button to start creating your Life Cycle. This will open up a new page, where you can create the Model.
Putting Information into the CX Life Cycle Model
Now that you’ve opened up the page where you can create the model, it’s time to start adding information.
Start by adding a Title in the top left-hand corner using the ‘Add CX Life Cycle title’ field.
Add your first stage by typing the name of the Stage in the ‘Add New Stage’ field and pressing the checkmark or by clicking anywhere outside of the field.
Now that you’ve created your first Stage, you will be able to add more Stages to the right of it or add Phases under it.
Name your first Phase by typing in the ‘Add new Phase’ field and then clicking the checkmark or pressing anywhere outside of the Phase text field.
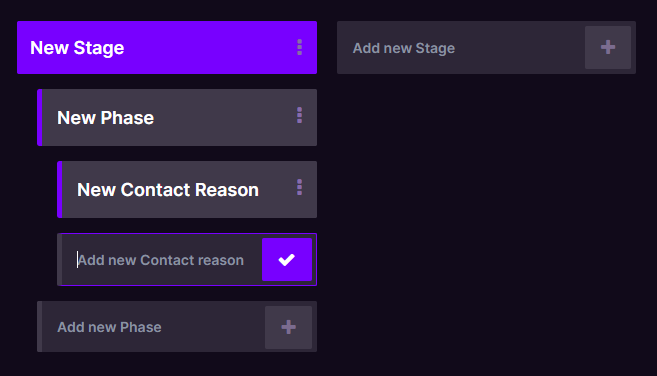
Follow the same steps to add your first Contact Reason in a Phase: type in the field labeled ‘Add new Contact Reason’ and press the checkmark or click anywhere outside of the Contact Reason Text field. Your screen will now be structured like this:
Continue to follow these steps to add your full CX Life Cycle Model.
Editing your CX Life Cycle Model
Although we recommend keeping your CX Life Cycle Model unchanged for a period of 1-3 years, adjustments will occasionally be necessary.
Editing the Title of your CX Life Cycle Model
Go to your Dashboard using the top navigation bar.
Select the Life Cycle Model you’d like to edit and press the three dots in the top right-hand corner.
Click ‘Edit’ in the dropdown menu
This will allow you to edit the Title of your CX Life Cycle Model
Editing Stages, Phases, and Contact Reasons of your CX Life Cycle Model
Go to your Dashboard using the top navigation bar.
Select the Life Cycle Model by clicking on the circular model you want to edit.
This will open up a page containing this CX Life Cycle Model. Change the view from the circular model to the list view in the top right-hand corner.

Once you’re in the list view, you can click the three dots next to the names of your Stages, Phases, and Contact Reasons. Clicking the three dots will open a dropdown menu in which you can select ‘Edit’.
Pressing ‘Edit’ will make it possible for you to type in the text fields again. Simply press the checkmark or anywhere outside the text fields to save your edits.
Duplicating & Deleting Stages, Phases, and Contact Reasons
Go to your Dashboard using the top navigation bar.
Select the Life Cycle Model by clicking on the circular model you want to edit.
This will open up a page containing this CX Life Cycle Model. Change the view from the circular model to the list view in the top right-hand corner.
Click the three dots next to the Title of your Stage Phase or Contact Reason to open a dropdown menu.
Either click ‘Delete’ to remove this Stage, Phase, or Contact Reason or click ‘Duplicate’ to create a copy.