How to Use Personas
Personas are a great way to show how different groups have different experiences. You can use Personas at different levels throughout the platform, collaborate using the same Personas or use some of your own.
Jump to
The difference between 'My Personas' and 'Our Personas'
In the Galaxy, there are two types of Personas you can use, ‘My Personas’ and ‘Our Personas’.
My Personas
These are personal Personas you can use throughout the platform, but they can not be used or edited by other users in your organisation’s account.
Other users can view the content of your ‘My Personas’ anywhere you’ve used it in published Milkymaps or Milkymaps you’ve requested feedback for, through comments or sharing for example. If you’re an admin, all user types can view any ‘My Personas’ you’ve added to a CX Life Cycle Model.
'My Personas' can be used for Personas that are specific to particular teams, Personas that are still being researched or developed or to allow Users to creatively apply the module throughout their Milkymaps.
Our Personas
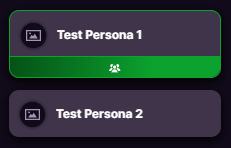
‘Our Personas’ can only be created by admins. They can be used in Milkymaps by all Users and other admins in the organisation. Other admins can also add them to a CX Life Cycle Model through Widgets. ‘Our Personas’ can be viewed by all user types in an organisation’s account. ‘Our Personas’ can easily be distinguished from ‘My Personas’ by their green colour.
'Our Personas' are a great way to help organize your organisation’s CX, because Users can add them to their Milkymaps, but can not edit them. Using ‘Our Personas’ will provide a standard within your organisation, allowing admins to control and monitor Persona use.
The Persona menu
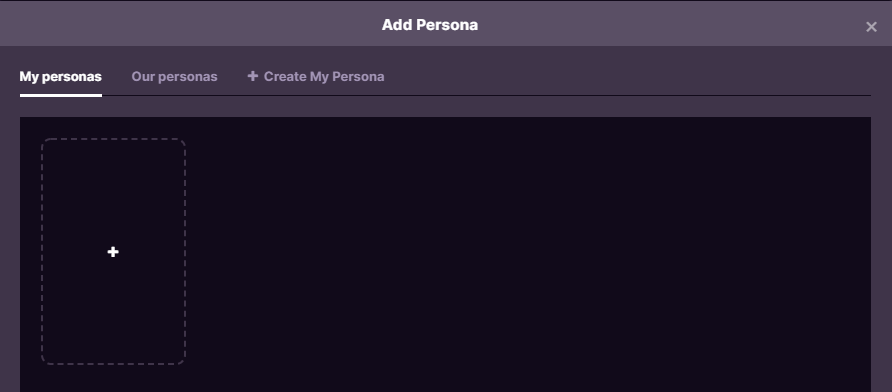
In the Persona menu in your Milkymap, you can accomplish two different main actions:
You can create a new Persona, either by using the ‘+' field or the right tab labelled ‘+ Create My Persona’. Admins can also create an ‘Our Persona’ by going to the second tab. This will change the last tab to '+ Create Our Persona’.
Add a ‘My Persona’ to either a Widget, an Episode Lane or a Touchpoint Lane. Simply press the overview or use the three dots in the top right corner and press ‘Add Persona’. You can add ‘Our Personas’ in the same way, simply switch to the second tab.
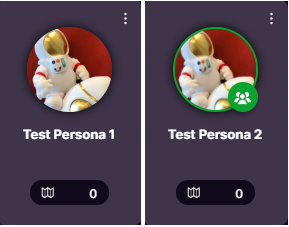
Persona Overview
For admins, you can find an overview of ‘My Personas’ and ‘Our Personas’ by selecting Personas in the dropdown menu under ‘Content Management’. Simply switch tabs to switch from viewing your personal Personas to Personas that are verified for the entire organisation to use. You can also create both types of Personas here if you’re an admin. Users can only create ‘My Personas’ for their personal use.
Persona Information
After pressing any of the ‘+ Create Persona’ buttons, you have a few options to create the perfect Persona. We’ll walk through all the Persona Information options that are available to add content to Personas. These options are the same for ‘My Personas’ and ‘Our Personas’.
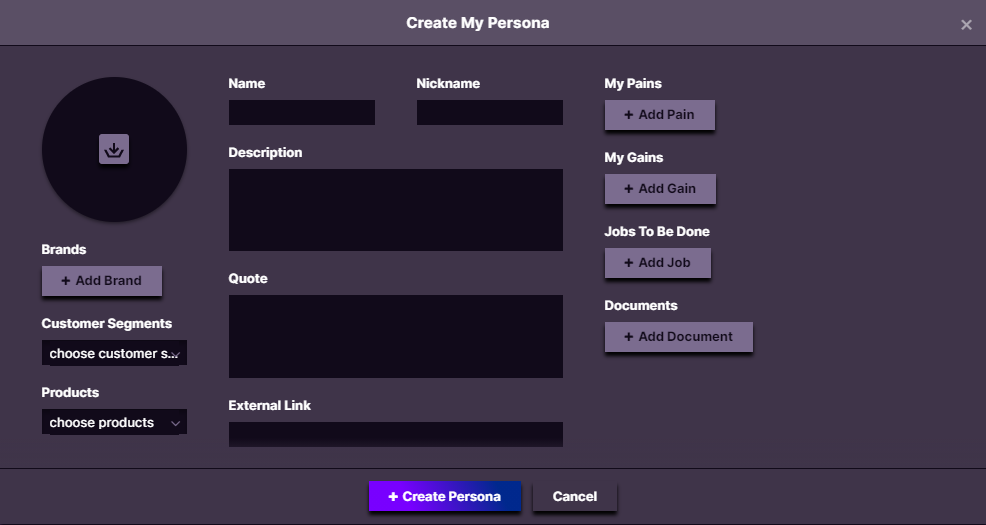
Image - Add an image to your Persona. The file types currently supported are .png, .jpg, and .jpeg.
Dimensions - Any Brands, Customer Segments and Products in your organisation’s account are available to add here.
Name - Add the Name of your Persona here.
Nickname - If your Persona has any type of Nickname, you add it using this field.
Description - Write a clear Description of your Persona in this field. You have full creative freedom here to build, by adding interests, details about their life, important people in their environment etc.
Quote - Add Quotes here that are relevant for your Persona.
External Link - This field can be used to link to any documents, overviews, videos etc. that will provide users with a complete image of this Persona.
Pains - Add any pain points or issues your Persona is experiencing here. These can range from general issues in connection to an organisation to very specific issues such as problems logging into a particular channel.
Gains - The opposite of your Persona’s Gains, use this field to add things that are currently going well or experienced as positive by your Persona.
Jobs to Be Done - Add anything your Persona would like to accomplish here.
Documents - Add files from your Milkymap account or add new files that add more depth to your Persona here.
Adding Personas to your Milkymaps
You can use Personas at different levels in your Milkymaps. We’ll start at an overall level and work our way down to the most detailed level.
Adding Personas through Widgets
You can add a Persona through your Milkymap through a Widget to signal the entire Customer Journey in this map is relevant for this particular Persona.
Add a new Widget by pressing ‘+ add widget’ at the top right section of your Milkymap.
This will open an Add Widget window, where you can select ‘Personas’ as the Widget type.
Press the ‘+ add persona’ button to open the Persona menu in your map. In this menu, you can add an existing Persona you’ve created, add an ‘Our Persona’ created by one of your admins or create a completely new Persona.
Adding Personas in an Episode Lane
By adding Personas to an Episode Lane, you’ll be able to indicate the importance of certain Episodes for particular Personas within a Customer Journey. To add Personas here:
Add a new Lane.

Either by clicking this button in the top right-hand corner or by using the plus sign in the sidebar.
Select ‘Personas’ as the Lane type
An ‘+ add persona' button will now appear below every Episode you’ve created, allowing you to access the Persona menu to create a completely new Persona or to add either an existing ‘My Persona’ or ‘Our Persona’.
Adding Personas in a Touchpoint Lane
Personas in Touchpoint Lanes can help you indicate the relevance of certain Touchpoints for one or multiple Personas. They can also help you identify Touchpoints that are important in a particular Persona’s Customer Journey or a Touchpoint with a channel that’s specific for this Persona to use for example.

Press the Episode header of the Episode you’d like to put information into. The Episode header is above the Episode title and contains the number of the Episode.
By pressing the Episode header, you’ll open the ‘Edit Episode' window. In this window, you’ll be able to create Touchpoint Lanes.
In the ‘Edit Episode’ window, press the + in the left sidebar to add a new Touchpoint Lane.
Select ‘Personas’ as the Touchpoint Lane Type to add or create Personas underneath your Touchpoints.
You can only add a Persona once to any location in your Milkymap. A Widget, for example, can contain multiple Personas, but can only contain each unique Persona once. The same rule applies for Persona fields in Episode and Touchpoint Lanes.
Adding Personas to your CX Life Cycle Model
Only admins can edit and add content to a CX Life Cycle Model. Adjustments and any added content, however, are available for all user types to see.
If you want to know how to add Widgets to your CX Life Cycle Model, simply use this section. Now that you’ve switched on the Edit mode to add content to your CX Life Cycle Model, simply select ‘Personas’ as the Widget type. This will open up the Persona menu, providing you with the same options you have when adding Personas to a Milkymap.