Integrating Jira with your Milkymap Galaxy account
By integrating Jira with the Milkymap Galaxy, you’ll be able to track work more efficiently. It will allow you to see the status of Jira items, create new items and connect them within the Galaxy environment.
To set up the integration, you’ll need to have access to Jira first. Log in to Jira before starting these integration steps and make sure you have the permission to add external application connections.
Jump to
Setting Up Your Jira Integration
In order for Milkymap to display information from Jira like the status of a task or project, you’ll first need to integrate the two platforms.
In the top right corner, press the gear icon to open the ‘Settings’ dropdown
In this dropdown menu, select ‘Products’ by pressing it
On the left-hand side, go to ‘Application Links’
In the field labelled ‘Enter the URL of the application you want to link’, enter the following URL :
https://galaxy.milkymap.com
You might receive a warning message regarding the response to the URL you’ve entered. Please double-check if you’ve entered the correct URL and then press ‘Continue’.

This will open up a new window where you can edit the link application information.
Simply enter ‘Milkymap’ as the application name and keep the Application Type set to ‘Generic Application’. Besides these required fields, you don’t need to enter any information before clicking ‘Continue’.
This will add a new entry to your list of Applications. Now that you’ve successfully created this entry, you can finish up the necessary integration steps in Jira.
In the list of your Applications, find the one named ‘Milkymap' you’ve just created
Go to the column on the right labelled ‘Actions’, press the pencil icon to edit this entry. This will open up a ‘Configure Milkymap’ window
In the menu of this window, select ‘Incoming Authentication’. You’ll see a ‘Consumer Key’ and a ‘Consumer Name’.
For the next steps, you’ll need access to the Milkymap Galaxy with an admin role.
Log in to Milkymap with an admin account role in another tab in your browser, or go through the following steps with someone who is a Galaxy account admin.
In the top menu bar, go to ‘Jira Details’ under ‘Galaxy Admin’
Copy the ‘Consumer Key’ and paste it into the ‘Consumer Key’ field in Jira
Copy the ‘Public Key’ information and paste it into the ‘Public Key’ field in Jira.
Add the name of your Milkymap Galaxy account or simply ‘Milkymap’ in the ‘Consumer Name’ field on Jira and save these details.
You have now finished all steps in Jira and just need to complete a last few simple steps in Milkymap to complete the integration.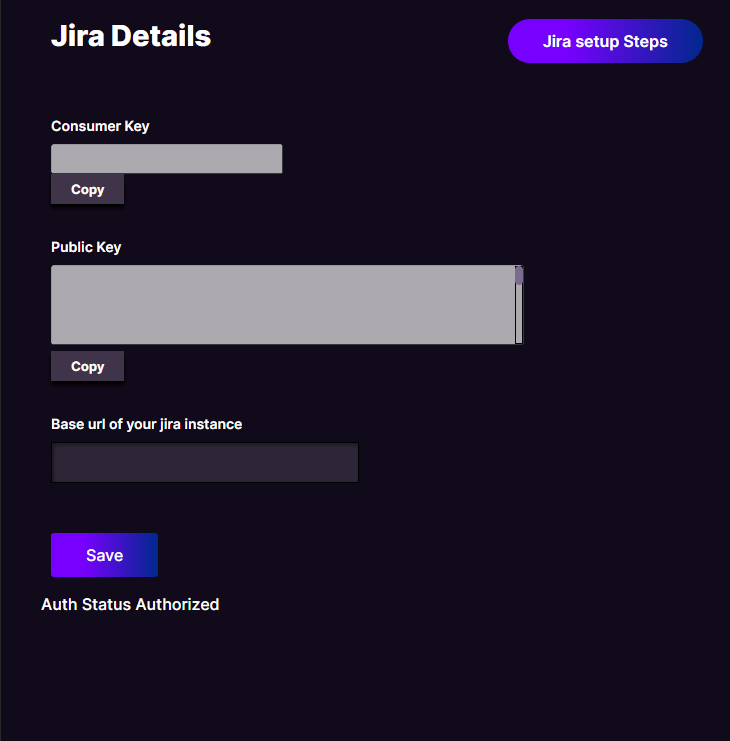
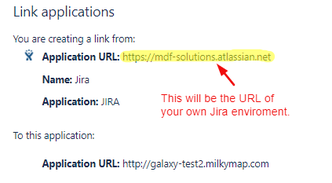
In the ‘Base URL of your Jira instance’ field, paste the URL of your Jira account. For example, https://xxxxx.atlassian.net, in which the x’s are usually your company or department name.
Press ‘Save’
An ‘Authorise’ button will now appear at the bottom of your Jira details. Press it to be redirected to your Atlassian (Jira) account and accept here.
Once you’ve accepted these final steps and are back in your Milkymap ‘Jira Details’ page, the integration has been successfully set up.