Incorporating Icons into your Milkymaps
Icons are a way to enrich the information in your Milkymaps.
Jump to
Available Icons
The Milkymap platform offers a library of 700 icons users can choose from. They range from more general icons like arrows, to specific icons like logos of organisations, such as YouTube, Twitter, or Google.
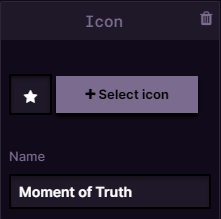
A Star Icon can be used to signify a ‘Moment of Truth’ in a journey for example
An admin can not change the available icons in the Icon Library, all 700 icons are identical for all users.
Adding Icons
You can incorporate Icons into your Milkymaps using both Widgets and Lanes
Through a Widget
Add a new Widget by pressing ‘+ add widget’
This will open an Add Widget window, where you can select ‘Icon’ as the Widget type.
Using Icons in a Widget provides you with a way to use it at an overall level, so the Icon applies to your entire Milkymap.This will create a new Widget, for you to put Icon Information in.
Through an Episode Lane
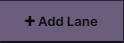
Add a new Lane.
Either by clicking this button in the top right-hand corner or by using the plus sign in the sidebar
Select ‘Icon’ as the Lane type
An ‘+ add icon' button will now appear below every Episode you’ve created.
Through a Touchpoint Lane
Press the Episode header of the Episode you’d like to put information into. The Episode header is above the Episode title and contains the number of the Episode.

By pressing the Episode header, you’ll open the ‘Edit Episode' window. In this window, you’ll be able to create Touchpoint Lanes.
In the ‘Edit Episode’ window, press the + in the left sidebar to add a new Touchpoint Lane.
Select ‘Icon’ as the Lane Type by clicking it.
An ‘+ add icon’ button will now appear underneath every Touchpoint you’ve added to this Episode.
Icon Information
After pressing the ‘+ add icon’ button, it will open up a space in which you can add the Icon Information. In both Widgets and Lanes, you are able to add multiple Icons below one another.

Press the ‘+ Select Icon’ to Select an Icon from the Icon Library. Once you’ve found an Icon you’d like to use, simply press it to add it to either your Widget or your Lane.
In the Icon Name field, you can give the Icon you’ve just selected a name. This way you can specify the use for the Icon you’ve just added. Pressing anywhere outside of the text field will save the name you’ve just added.