How to add Media to your Milkymaps
In Milkymap, you can add two types of Media: images and videos. They’re a great visual aspect of your Milkymaps, that will help you and your team view the experience from a customer’s perspective. Visual components can also help you during a presentation, or when discussing the Customer Journey Map you’ve created with others.
Jump to
Default Locations for Media
Media can be added to two standardized locations in your Milkymaps.
You have the option to add Media to the Milkymap Details, at the top left-hand side of your Milkymap.
It is also possible to add Media to all of your Episodes.
Add media at an even more detailed level: connected to the Touchpoints within your Episodes.
Both of these default locations provide the same Media options as adding a new Media location through either Widgets or Lanes.
Adding Media to your Milkymaps
Media can be put into your Milkymap in two different ways. Either by using a Widget, or using a Lane.
Through a Widget
Add a new Widget by pressing ‘+ add widget’. You can add a Widget at the top of your Milkymap, next to all the Journey information.
This will open an Add Widget window, where you can select ‘Media’ as the Widget type.
A Media Widget provides you with the opportunity to add Media that’s relevant to the overall Milkymap.This will create a new Widget where you can click the icon below to add Media.

Through a Lane
Add a new Lane.
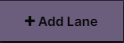
Either by clicking this button in the top right-hand corner or by using the plus sign in the sidebar
Select ‘Media’ as the Lane type
A button like the one below will now appear below every Episode you’ve created.
This will open the ‘Add Media’ window
Through a Touchpoint Lane
Press the Episode header of the Episode you’d like to put information into. The Episode header is above the Episode title and contains the number of the Episode.

By pressing the Episode header, you’ll open the ‘Edit Episode' window. In this window, you’ll be able to create Touchpoint Lanes.
In the ‘Edit Episode’ window, press the + in the left sidebar to add a new Touchpoint Lane.
Select the Touchpoint Lane Type ‘Media’
A button like the one below will now appear below every Episode you’ve created.
This will open the ‘Add Media’ window
Add Media Options
There are a few options for you to include Media in your Milkymap, but first, select if you’d like to add an Image or a Video.
Images
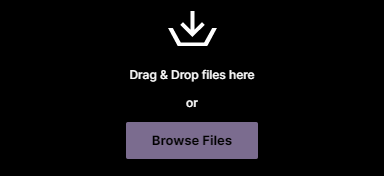
First, open the ‘Add Media’ window.
There are two options:
Using Milkymap’s Image Library - Simply click an image you’d like to include in your Milkymap, with just one click it will be added.
Adding New Media - Drag & Drop an image in the window, or browse your files and select the image you’d like to include. Milkymap supports the following image file types: .png, .jpeg, .jpg.
Videos
First, open the ‘Add Media’ window.
Copy the URL of the video you’re looking to add. Milkymap supports YouTube and Vimeo videos.
Paste the video URL in the field that reads ‘Add the URL here …’
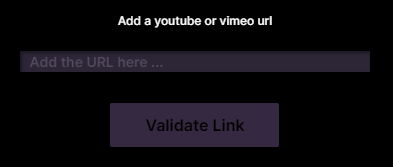
Click the ‘Validate Link’ button. This will provide a video preview of the URL you’ve pasted.
Either ‘Reselect Media' if you’re not satisfied, press ‘Insert Media’ if you’re satisfied. If you changed your mind and don’t want to add any media, press ‘Cancel’ or the X in the top-right corner of the ‘Add Media’ window.